CI / CD pipeline for infrastructure code
This diagram shows a rough overview of the Gruntwork Pipelines architecture:
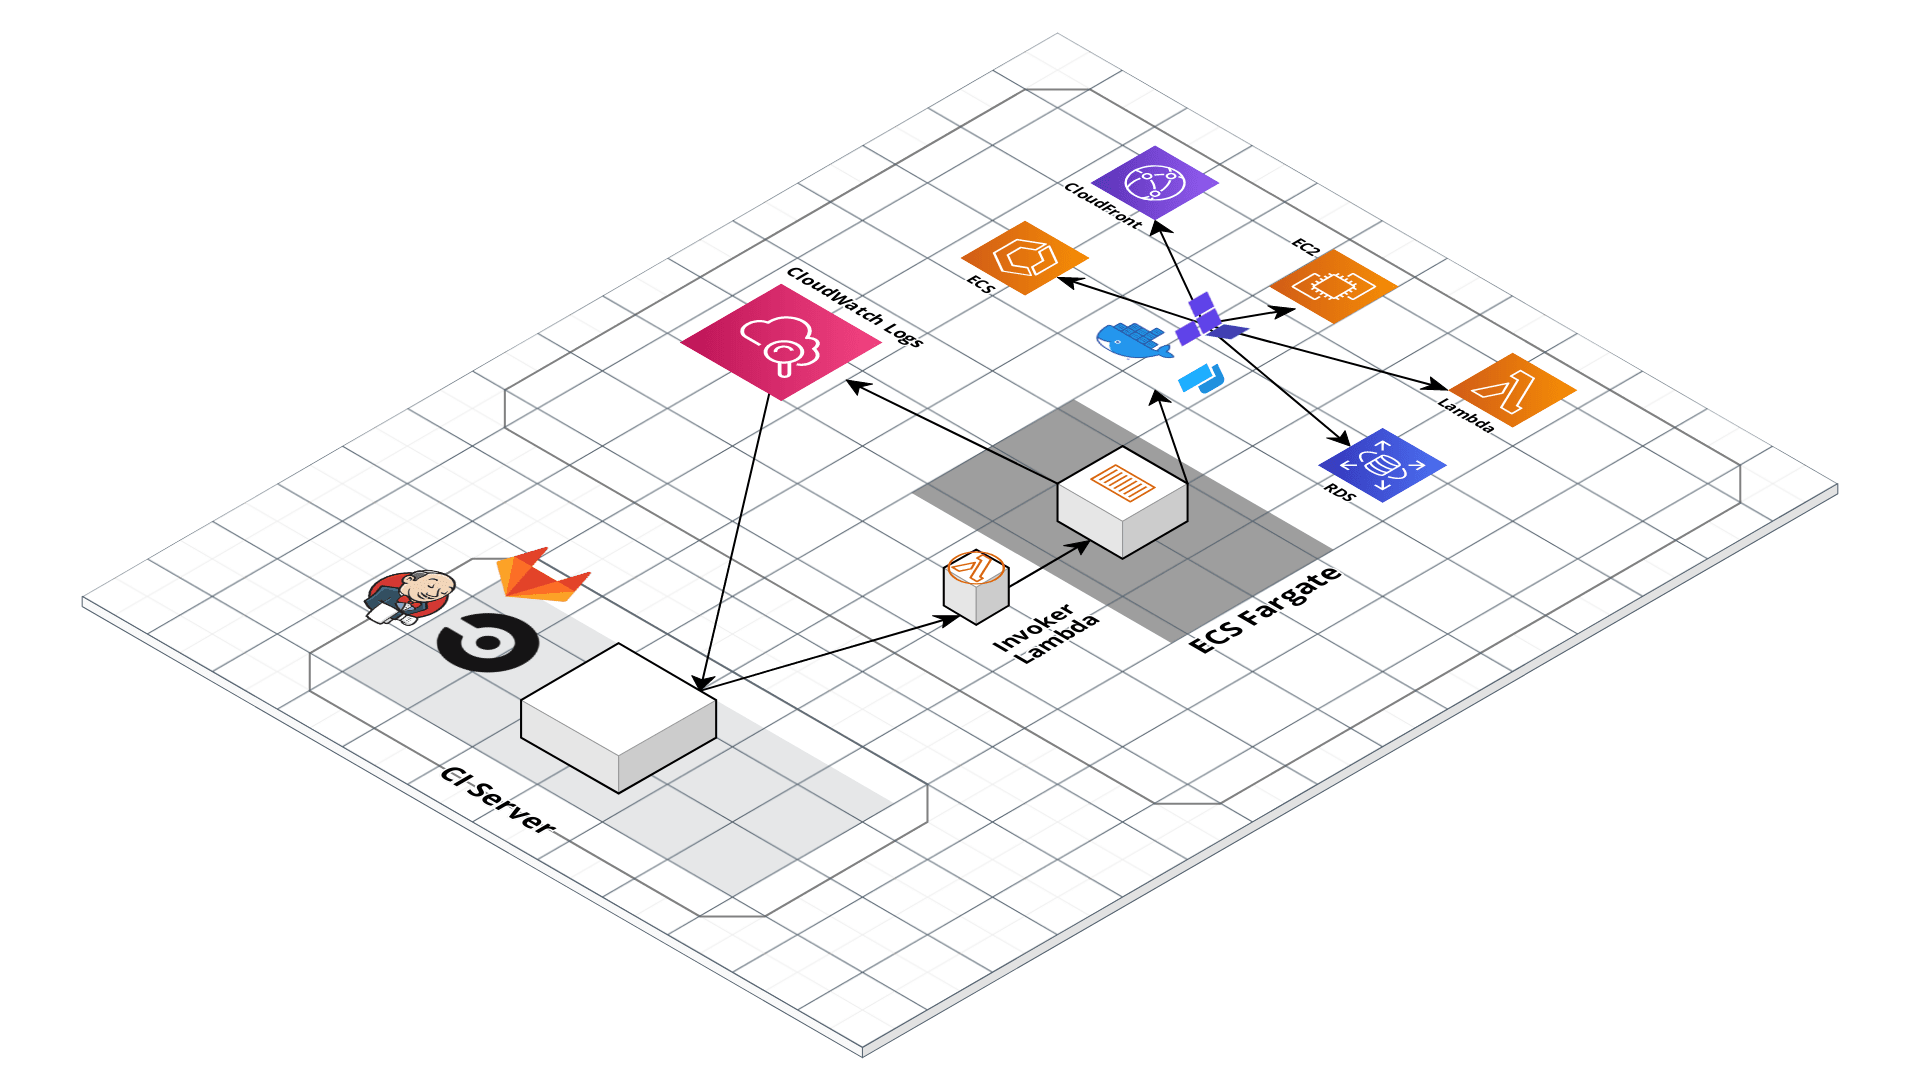 Architecture Diagram
The Gruntwork Pipelines workflow, defined in .github/workflows/pipelines.yml, works like this:
- A CI server is hooked up to watch for changes in your
infrastructure-liverepository. - Every time a new commit is pushed, the CI server looks for modules that have changed in the repository.
- For each module that changed, trigger a
planaction on the module by invoking the ECS deploy runner. - The ECS deploy runner is invoked using an AWS Lambda function that exposes a limited range of actions that can be performed in a deploy container that has all the necessary tools installed.
- The infrastructure code runs from within a Docker container in an ECS task on Fargate (or EC2). This task is what has the powerful AWS credentials to deploy infrastructure.
- CI server will run first run a
plan. - If the Slack integration is set up, a notification will be sent to the Slack channel that the plan succeeded or failed.
- Next, the CI server will run
apply. The Slack integration will post a notification about whether the apply failed or succeeded.
Set up the pipeline in your own organization
First, make sure you've copied the repo into your own GitHub organization as a new repository. You can name it whatever you'd like. We usually call it infrastructure-live. The GitHub Actions workflow is already configured in <YOUR_REPO_ROOT>/.github/workflows/pipelines.yml. Here are the additional steps to get the job running successfully:
Get the machine user credentials from AWS
- Log into the Security account in the AWS Console.
- Go into IAM and find the ci-machine-user under Users.
- Go to Security Credentials > Access Keys > Create Access Key.
- We will use these values as the
AWS_ACCESS_KEY_IDand theAWS_SECRET_ACCESS_KEYbelow.
Configure a Slack Workflow
If you'd like to send Slack notifications when the pipeline is running, follow the steps in this section.
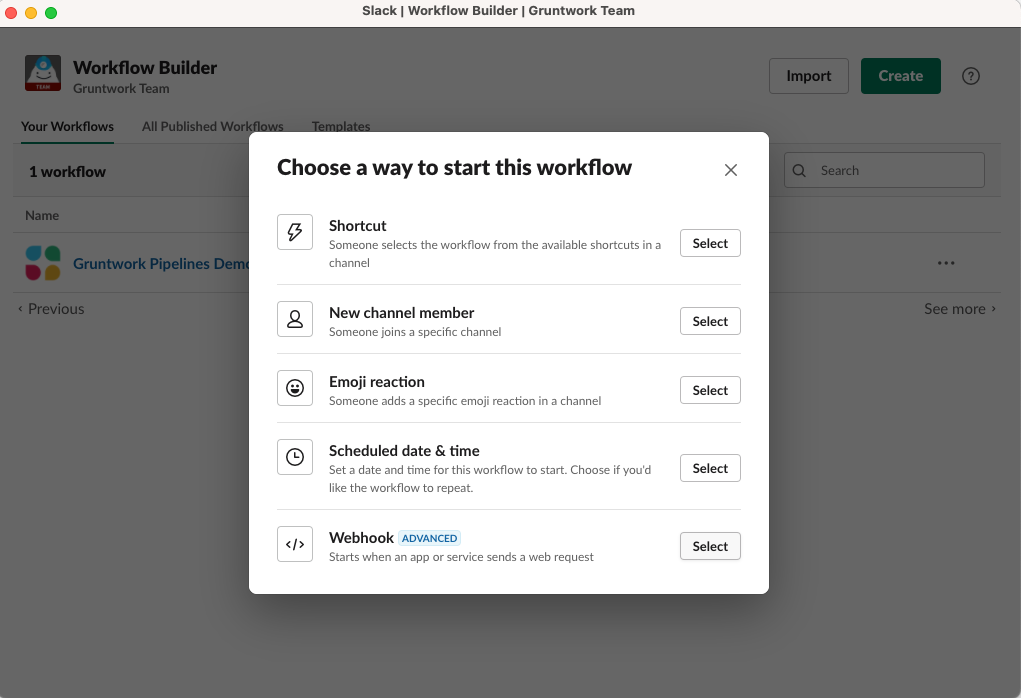
In Slack, open the Workflow builder:
 Slack Workflow Builder
Create a new Webhook workflow called "Gruntwork Pipelines"
 Slack Webhook workflow
Add the following text variables to the workflow:
branch,status,url,repo, andactor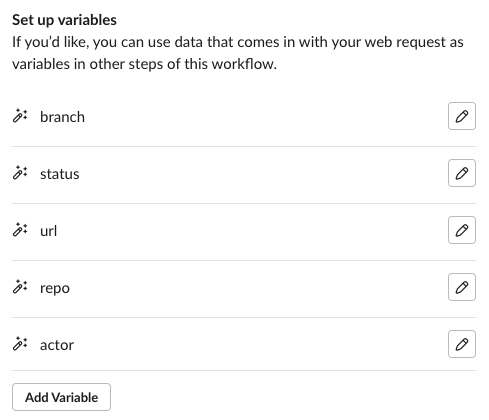 Slack workflow variables
Once all of the variables are added, click Next.
Now add another step to the workflow
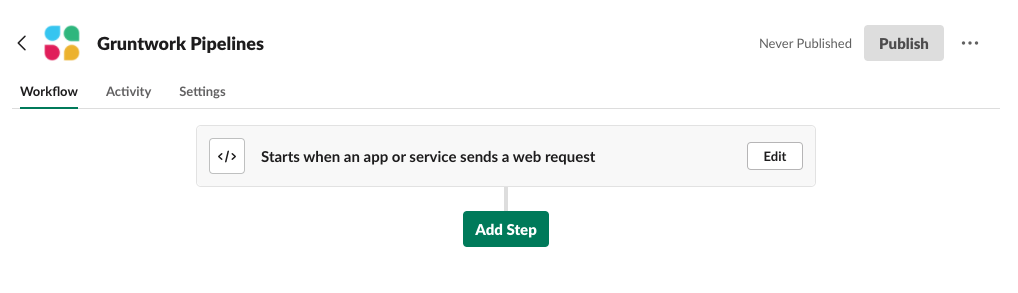 Slack workflow add step
Add the "Send a message" step
Choose a channel from the dropdown menu
In the Message Text field, paste the following contents:
Repo: <insert the repo variable>
Branch: <insert the branch variable>
Actor:  <insert the actor variable>
Status: <insert the status variable>
Workflow URL: <<insert the url variable>Use the "Insert a variable" button to insert a variable for each of the placeholders in the message above.
Save the Send a message step.
Hit the Publish button to make the Workflow live.
Copy the webhook URL and save it. We will use this value below.
 Slack workflow add step
Note that the webhook URL should be treated as sensitive. Anyone with the URL can send HTTP requests to the webhook!
Add secrets to GitHub
Open the GitHub repository and navigate to Settings => Secrets.
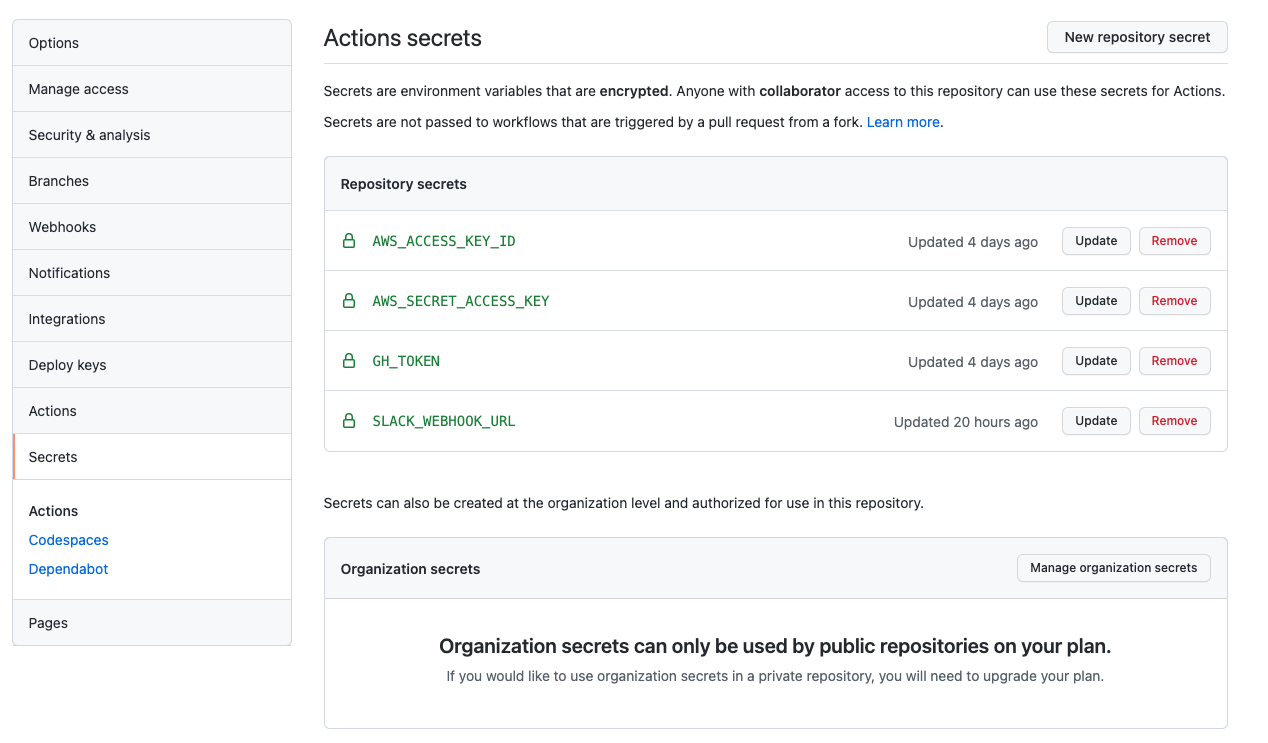 GitHub Secrets
Create the following repository secrets:
AWS_ACCESS_KEY_ID: This is the first value from the AWS IAM user step above.AWS_SECRET_ACCESS_KEY: This is the second value from the AWS IAM user step above.GH_TOKEN: Enter the GitHub machine user's oauth token here. If you don't know this, you can find it in the AWS Secrets Manager secret that you provided in thereference-architecture-form.yml.SLACK_WEBHOOK_URL: This is the value from the Slack Workflow step above.
Done
That's it. Access the pipeline in the Actions tab in GitHub.
Destroying infrastructure
For instructions on how to destroy infrastructure, see the Undeploy guide.